
🧰 Tools & Gear You’ll Need
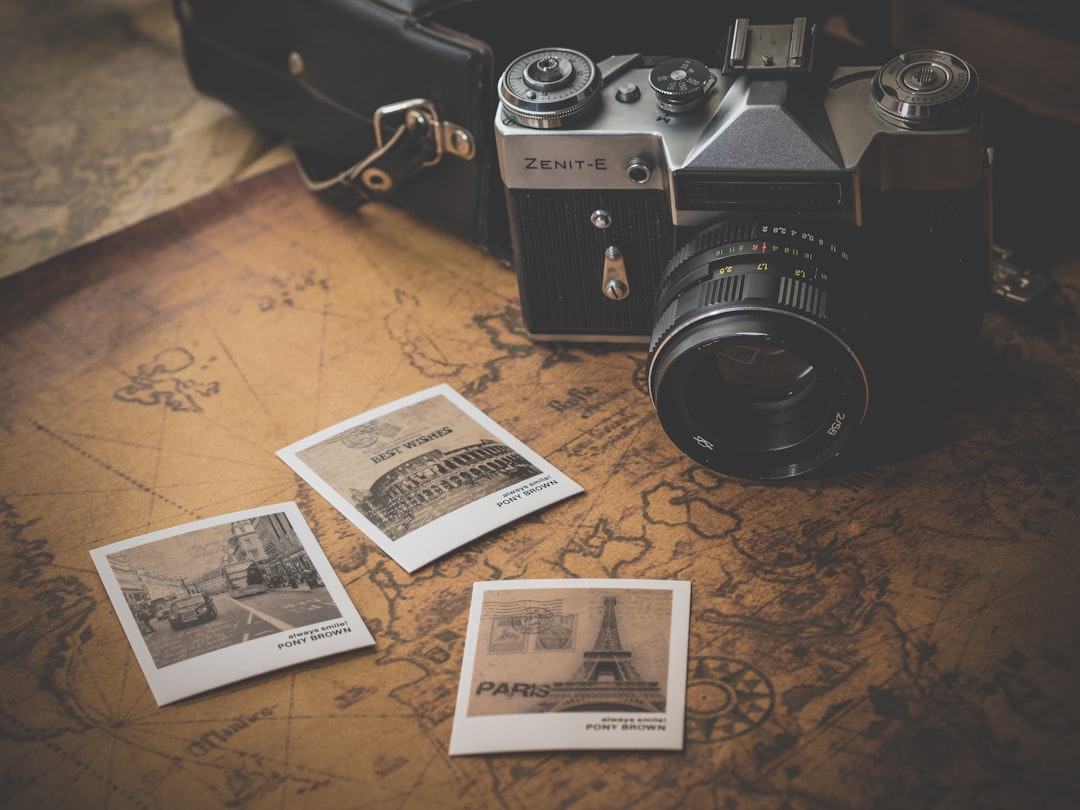
- A camera (DSLR, Mirrorless, or even a high-end smartphone)
- Versatile lenses (e.g., wide-angle for landscapes, prime for portraits)
- A sturdy tripod for low-light and long-exposure shots
- Extra batteries and memory cards
- Lens cleaning kit
- Portable hard drive or cloud storage for backups
- Optional: ND filters, polarizing filter, remote shutter release
Understanding Aesthetic Travel Photography
Defining Aesthetic Travel Photos
Aesthetic travel photography is more than just documenting a place; it’s about capturing the feeling, the mood, and the unique essence of a destination. It’s about creating images that evoke emotion and tell a story, transforming ordinary scenes into compelling visual narratives. An aesthetic photo goes beyond a simple snapshot; it possesses a deliberate artistic quality, achieved through careful consideration of composition, light, color, and subject matter. In 2026, with the ubiquization of advanced smartphone cameras and AI-powered editing tools, the differentiator lies in the photographer’s vision and their ability to imbue their work with personal style and a deeper connection to the travel experience.
Key Elements of Aesthetic Composition
At the heart of aesthetic travel photography lies strong composition. This involves the arrangement of visual elements within the frame to create balance, harmony, and visual interest. Key elements include:
- Rule of Thirds: Dividing your frame into nine equal parts with two horizontal and two vertical lines, and placing key subjects along these lines or at their intersections. This creates a more dynamic and engaging image than centering the subject.
- Leading Lines: Using natural or man-made lines (roads, paths, rivers, architecture) to guide the viewer’s eye into the photograph and towards the main subject.
- Symmetry and Patterns: Identifying and utilizing symmetrical elements or repeating patterns in architecture, nature, or urban environments to create visually pleasing and often dramatic images.
- Framing: Using elements within the scene (doorways, windows, branches) to create a natural frame around your subject, adding depth and context.
- Negative Space: The empty or uncluttered areas in a photograph that help to draw attention to the main subject and give the image breathing room.
The Role of Light and Shadow
Light is the photographer’s primary tool. Understanding how light behaves is crucial for aesthetic travel photography. Natural light, in particular, can dramatically alter the mood and feel of a scene. Golden hour (shortly after sunrise and before sunset) offers soft, warm light that is incredibly flattering for landscapes and portraits. Blue hour (just after sunset or before sunrise) provides a cool, serene tone. Shadows, too, are vital. They can add depth, dimension, and drama, define textures, and guide the viewer’s eye. Mastering the interplay of light and shadow allows you to sculpt your images and convey specific emotions.
Planning Your Aesthetic Travel Photoshoot
Location Scouting for Aesthetic Appeal
Finding the right locations is paramount. Look beyond the obvious tourist hotspots. Seek out places with unique textures, interesting architecture, vibrant local life, or stunning natural beauty. Research your destination beforehand using online resources, travel blogs, and social media (but look for less common shots!). When you arrive, explore beyond the main streets. Wander through local neighborhoods, visit markets, and find quieter spots. Consider the time of day and how the light will interact with the location.
Best Time of Day for Aesthetic Lighting
As mentioned, the ‘golden hours’ – sunrise and sunset – are photographic gold. The low angle of the sun creates long shadows, warm tones, and a soft, diffused light that minimizes harshness and adds a magical quality. Sunrise offers the advantage of fewer crowds. The ‘blue hour,’ the period just before sunrise or after sunset, provides a beautiful, cool-toned light perfect for cityscapes and moody landscapes. Midday sun is often the least flattering, creating harsh shadows and blown-out highlights. If you must shoot at midday, seek shade or focus on graphic compositions that work with the strong light.
Creating a Mood Board for Inspiration
A mood board is a collection of images, colors, textures, and keywords that represent the aesthetic you want to achieve. Before your trip, gather inspiration from magazines, Pinterest, Instagram, and art. What kind of colors do you want to emphasize? What mood do you want to convey – serene, adventurous, nostalgic? This visual guide will help you stay focused and intentional during your travels, reminding you of your artistic goals amidst the excitement of discovery.
Essential Photography Gear for Travel
While a professional camera setup can be beneficial, the best gear is often what you’re comfortable carrying. For travel, prioritize versatility and portability. A good all-around zoom lens (like a 24-70mm equivalent) is invaluable. If you specialize, consider a wide-angle for landscapes or a prime lens (like a 50mm) for its sharpness and low-light capability. A lightweight, sturdy travel tripod is essential for low-light situations, long exposures (like waterfalls or star trails), and achieving tack-sharp images. Don’t forget spare batteries and memory cards – running out of power or space is a photographer’s nightmare.

Mastering Aesthetic Photography Techniques
Composition Techniques for Aesthetic Travel Photos
Beyond the basic rules, understanding how to arrange elements leads to impactful images. Experiment with:
- Rule of Thirds and Leading Lines: As discussed, these are foundational. Practice identifying lines in your environment – fences, roads, rivers, architectural elements – and use them to draw the viewer into your frame.
- Symmetry and Patterns: Look for reflections in water, repeating architectural details, or natural formations. Sometimes, slight adjustments in your angle can turn a near-symmetrical scene into a perfectly balanced one.
- Framing and Negative Space: Use foreground elements like tree branches, archways, or even people to create a frame. Negative space, often the sky or a plain wall, can make your subject stand out dramatically. Don’t overfill the frame; sometimes less is more.
Capturing Movement and Emotion
Travel is dynamic. Capture this energy by photographing people in motion, bustling markets, or flowing water. Use slower shutter speeds to create a sense of movement (e.g., blurred motion in a dancer or car lights). Conversely, a fast shutter speed can freeze a fleeting moment of emotion – a smile, a gesture, a child’s laughter. Look for authentic interactions and candid moments; these often tell the most compelling stories.
Utilizing Natural Light for Aesthetic Shots
Learn to ‘read’ the light. Is it harsh and direct, soft and diffused, warm or cool? Use backlighting to create silhouettes or rim lighting. Side lighting emphasizes texture and form. Overcast days provide soft, even light perfect for portraits or detailed shots where you want to avoid harsh shadows. Don’t just shoot what’s in front of you; observe how the light transforms the scene and position yourself to take advantage of it.

Advanced Techniques: Long Exposures and Bokeh
Long Exposures: Requires a tripod and a slower shutter speed (seconds or even minutes). This technique is fantastic for smoothing out water (waterfalls, seascapes), creating light trails from moving vehicles at night, or blurring clouds to add dynamism to landscapes. Use an ND filter to allow longer exposures in bright daylight.
Bokeh: This refers to the aesthetic quality of the blur in the out-of-focus parts of an image. It’s typically achieved using a wide-aperture lens (e.g., f/1.8, f/1.4) at a shallow depth of field. This effectively isolates your subject from the background, creating a pleasingly blurred backdrop, often with beautiful circular highlights. It’s perfect for portraits and highlighting details.
Editing Your Aesthetic Travel Photos
Introduction to Photo Editing Software
Editing is where your vision truly comes to life. Software like Adobe Lightroom, Capture One, or even free options like GIMP and mobile apps like Snapseed, allow you to refine your images. Learn the fundamental tools: exposure, contrast, white balance, saturation, and sharpening. Modern AI-powered tools can also assist with complex tasks like sky replacement or noise reduction, but understanding the manual controls provides a deeper artistic foundation.
Essential Editing Steps for Aesthetic Enhancement
Your editing workflow should enhance, not overpower, the original scene. A common, effective workflow:
- Color Correction and Grading: Start by correcting the white balance to ensure colors are natural. Then, ‘grade’ the image by adjusting colors to achieve a specific mood or aesthetic. This could involve warming up a sunset, cooling down a night scene, or desaturating certain colors to create a more muted feel.
- Contrast and Brightness Adjustments: Fine-tune the overall brightness (exposure) and contrast. Ensure you have a good range from deep shadows to bright highlights without losing detail in either. Adjusting the tone curve offers more precise control over these elements.
- Sharpening and Noise Reduction: Apply sharpening carefully to bring out detail, especially in textures. Use noise reduction sparingly, particularly for high ISO shots, as overdoing it can make images look plasticky and unnatural.

Applying Presets for a Cohesive Aesthetic
Presets are pre-defined editing settings that can quickly give your photos a consistent look and feel. While convenient, be wary of applying them blindly. They should be a starting point. Always adjust the preset to suit the individual photo’s lighting and color conditions. True aesthetic comes from a consistent *style*, not just identical presets.
Common Editing Mistakes to Avoid
Key pitfalls include:
- Over-saturation: Making colors too intense, leading to a garish look.
- Too much sharpening: Creating halos around edges and emphasizing noise.
- Crushed blacks or blown-out highlights: Losing detail in the darkest or brightest areas.
- Incorrect white balance: Images appearing too blue (cool) or too yellow/orange (warm).
- Inconsistent edits: Each photo having a wildly different look, failing to create a cohesive series.
Showcasing Your Aesthetic Travel Photos
Best Platforms for Sharing Travel Photography
Instagram remains a dominant platform for visual content, but consider dedicated photography sites like Flickr, 500px, or even Behance for a more professional portfolio. Personal blogs or websites offer the most control over presentation. For 2026, short-form video content on platforms like TikTok or Instagram Reels, showcasing behind-the-scenes or editing processes, can also be highly engaging.
Crafting Compelling Captions
Your captions should complement your images. Tell a story, share a useful tip, ask a question to engage your audience, or provide context about the location. Don’t just state the obvious. Aim for authenticity and connection. Hashtags are still important for discoverability, but use them strategically.
Building Your Travel Photography Portfolio
A strong portfolio is curated. Select only your best work that demonstrates a consistent style and vision. Organize your photos logically, perhaps by destination or theme. Ensure high-quality presentation across all chosen platforms. For professional aspirations, a dedicated website is essential.

FAQ: Aesthetic Travel Photography Tips for 2026
Q1: How can I make my travel photos stand out in a crowded feed?
Focus on developing a unique personal style through consistent composition, lighting, and editing. Tell stories with your images and captions. Look for unconventional perspectives and moments that others might miss. Authenticity and a clear artistic vision are key differentiators in 2026.
Q2: Is it better to use a smartphone or a dedicated camera for travel photography?
Modern smartphones have incredible capabilities, especially in good light. However, dedicated cameras still offer superior control over settings like aperture and shutter speed, better low-light performance, and interchangeable lenses, which provide greater creative flexibility. The ‘best’ tool is the one that best suits your needs and skill level. The key is mastering the tool you have.
Q3: How important is gear for aesthetic travel photography?
Gear is important, but vision is more critical. While professional equipment can offer advantages, excellent aesthetic photos can be taken with almost any camera. Focus on understanding composition, light, and editing. Learn to push the limits of your current gear before investing heavily in new equipment.
Q4: What are the biggest mistakes beginners make in travel photography?
Common mistakes include: poor composition (centering subjects, cluttered frames), ignoring the light (shooting only at midday), over-editing, and not backing up photos. Also, failing to plan and simply snapping away without intention. Remember, a photograph is ‘light writing’ – understand the light first.
Conclusion: Elevate Your Travel Photography Aesthetic
Creating aesthetic travel photos in 2026 is an art that blends technical skill with a discerning eye and a compelling narrative. By understanding the fundamentals of composition and light, planning meticulously, mastering editing techniques, and sharing your work thoughtfully, you can transform your travel snapshots into captivating works of art. Remember that the most profound aesthetic often comes from a deep connection with the place you’re visiting and a willingness to explore beyond the surface. Keep shooting, keep learning, and most importantly, keep telling your unique travel stories through your lens.